Monthly Archives: June 2012

How to friendly use a PPT to Blu ray converter?

Leawo PPT to Blu ray converter is a conversion tool specially designed for converting PPT to Blu ray, PPT to DVD and even PPT to video. Using a PPT to Blu ray converter, you are also able to personalize the DVD menu and even add some additional effects for the output Blu ray videos such as voice narration for each slides and watermark. If you are just troubled on converting PPT to Blu ray for playing PowerPoint on Blu ray Player or TV, then this guide will be your reference.

Guide: how to convert PPT to Blu ray with a PPT to Blu ray converter.

Before the conversion, just download and install the PPT to Blu ray converter.

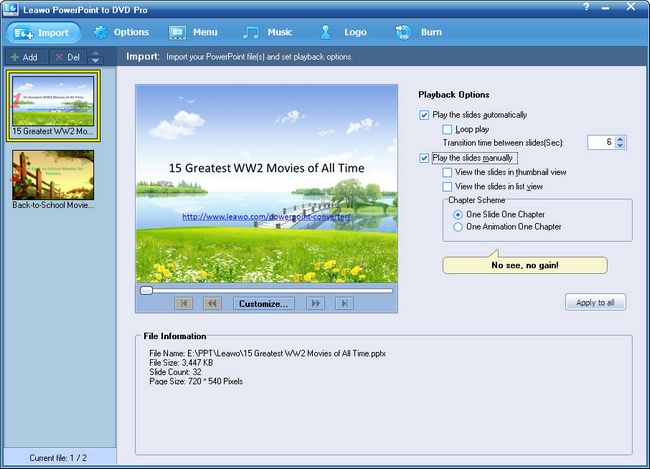
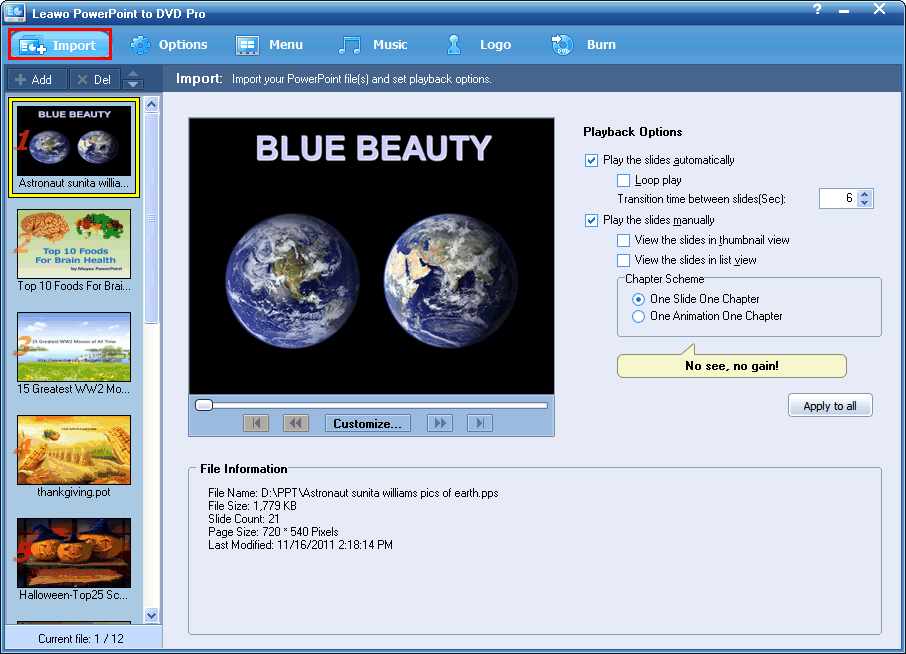
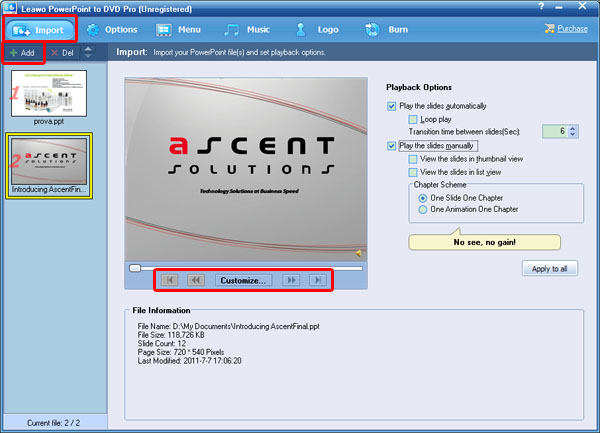
1. Import the PPT files

Click Add or Import to fill in a PPT file (PowerPoint 2000 or later) for converting to Blu-ray Disc. You can maximum add 12 PowerPoint presentations at once for batch conversion. Preview the PPT file on the built-in view player.

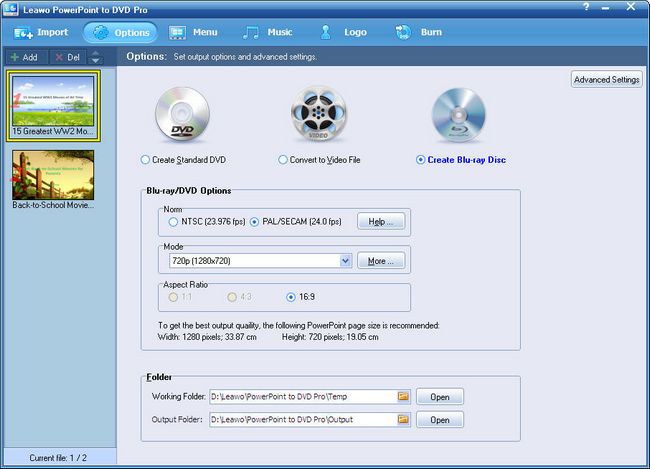
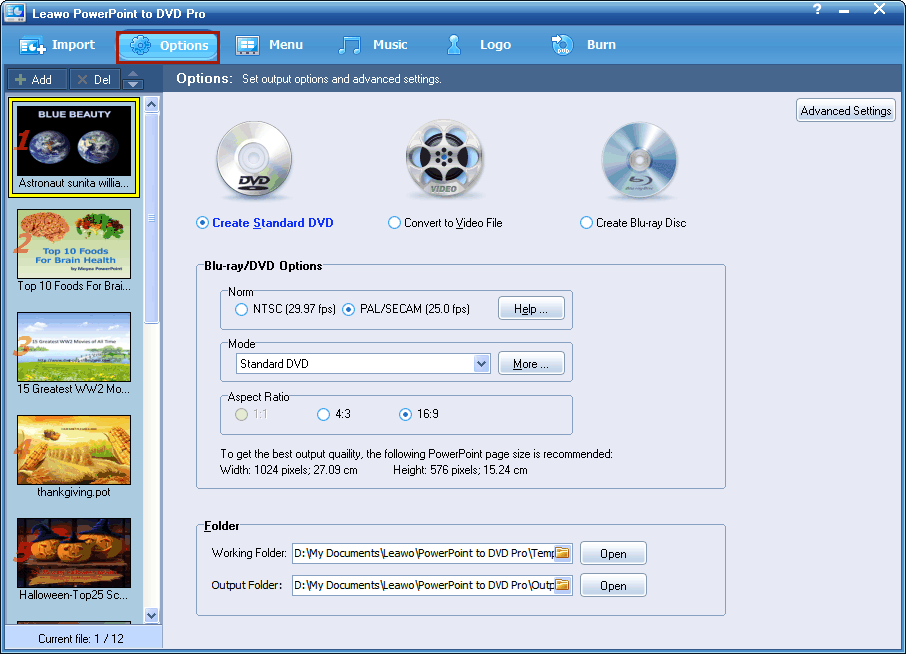
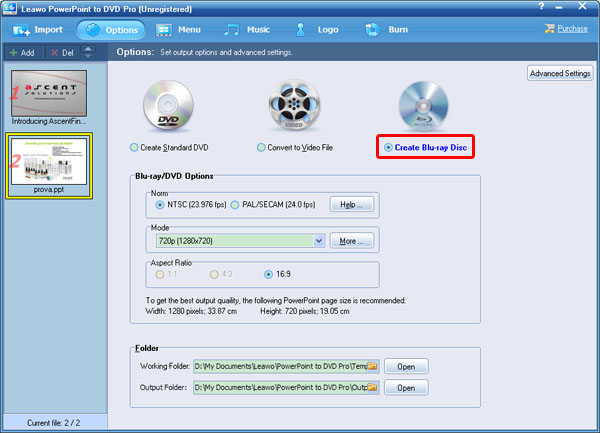
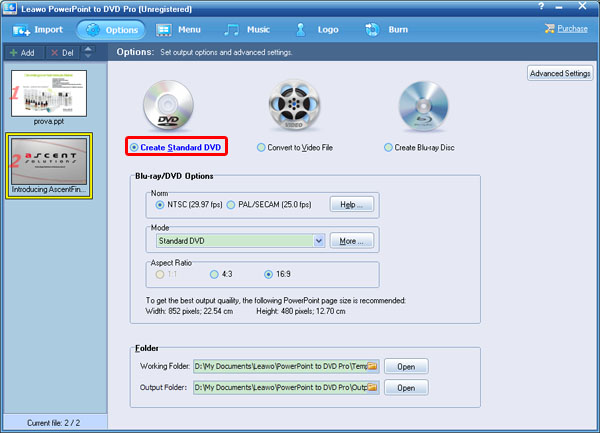
2. Choose output options

Click Options in the menu bar to choose an output format for selected PPT file, and the choose “create Blu ray disc”.

Click Advanced Settings to customize the Blu-ray/DVD slideshow. The following interface appears:

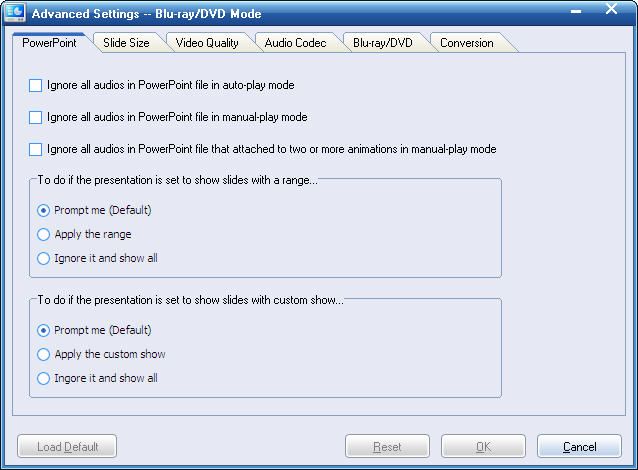
In the above interface, adjust audio status in your PPT file, size of slides, and quality of video, audio codec, Blu-ray language code, Blu-ray menu parameters, and conversion status.
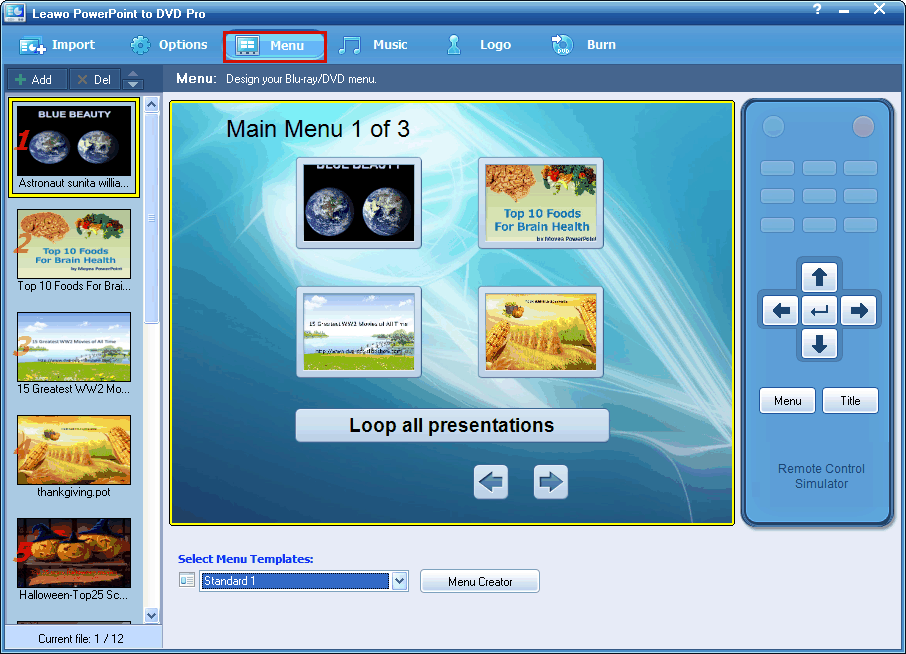
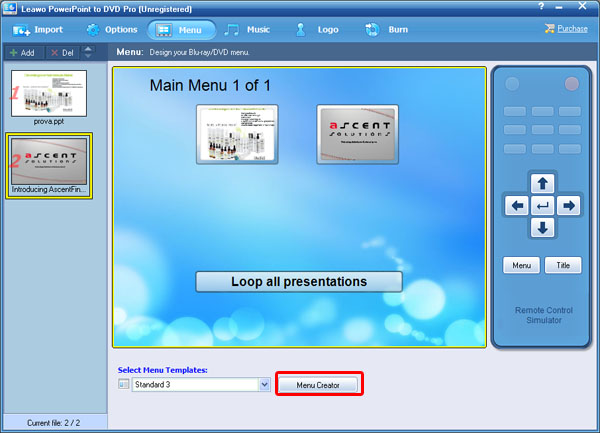
3. Create DVD menu

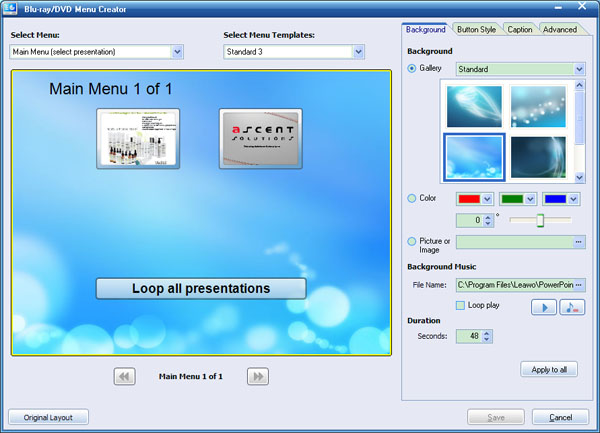
Click “menu” to enter the DVD menu panel, where you can choose DVD menu template from the pre-installed templates or create your own DVD menu by clicking “menu creator”.

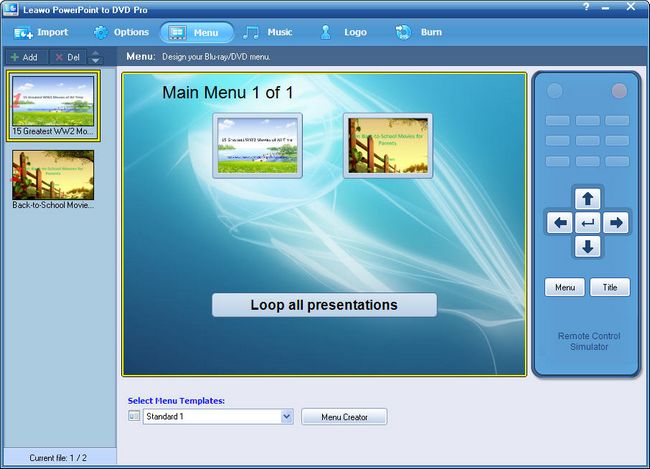
In “Menu creator”, you are able to set background, button style, caption, and other properties for selected presentation.

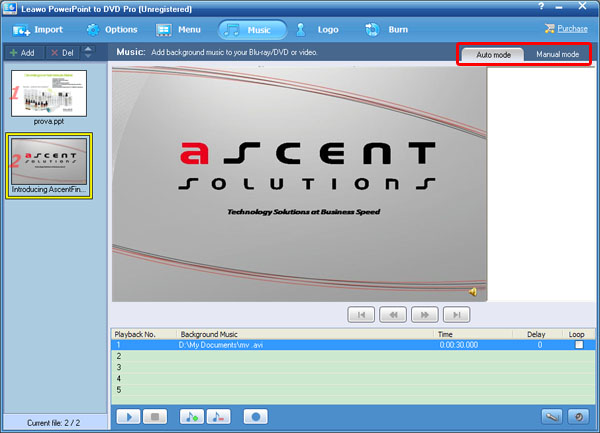
4. Add background music for blu ray slideshow

Click “music” to add background music or just record voice narration for your output blu ray slideshow.

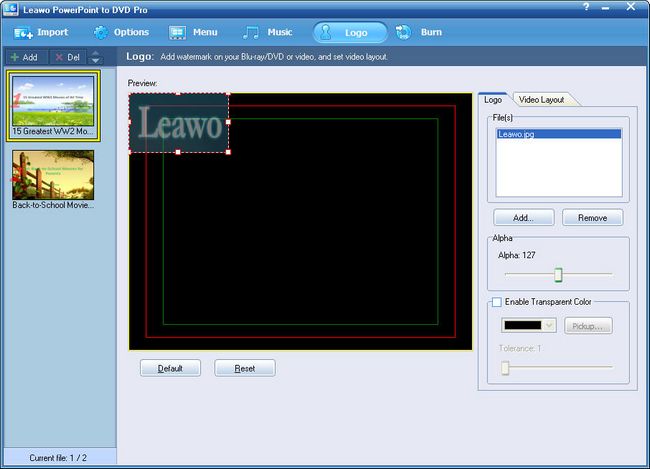
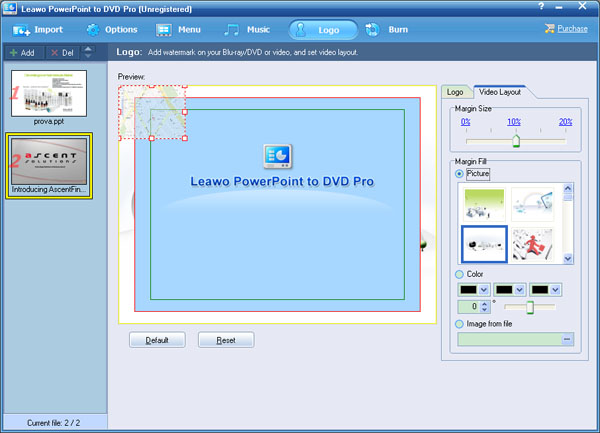
5. Add watermark or logo for the output blu ray slideshow

To give a mark to output DVD or Blu-ray Disc, click on the “Logo” tab. There are two parts: Logo and Video Layout.

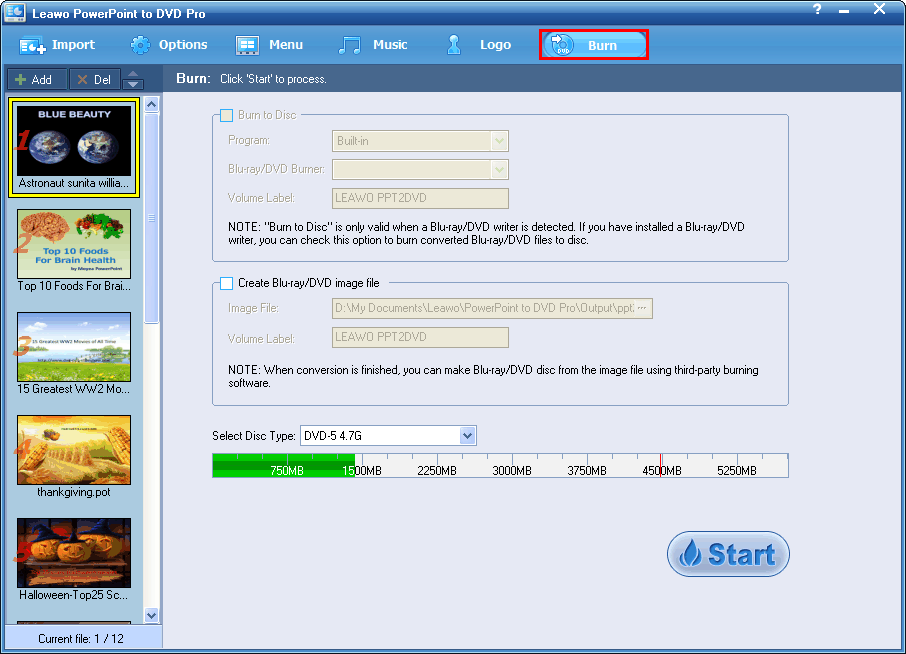
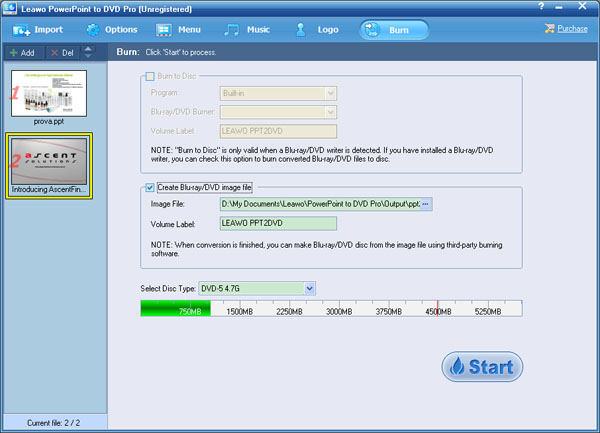
6. Convert PPT to blu ray

To burn the PowerPoint file(s) directly to disc, you should first have a Blu-ray/DVD writer installed and a blank DVD or Blu-ray disc inserted on your PC. Otherwise, the Burn to disc option will be NOT available. Alternatively, you can make an ISO file by ticking “Creating Blu-ray/DVD image file”.

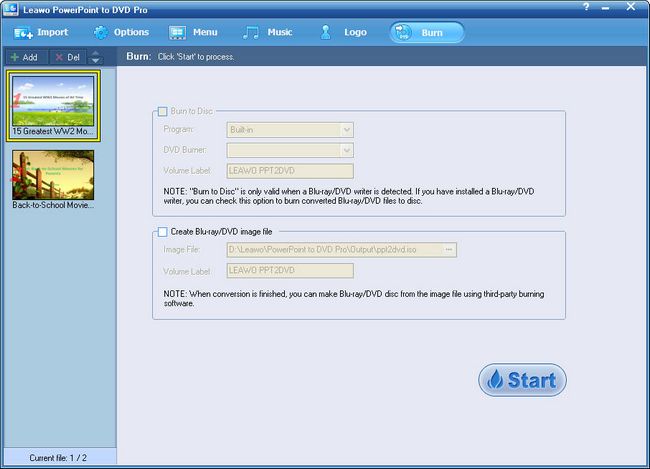
At last, simply click “start” to convert PPT to Blu ray with this PPT to Blu ray converter and then burn to a Blu ray disc.

How to convert PPT to Blu ray with Leawo PPT to DVD Pro?

Blu-ray is a media format designed to replace the DVD format. Blu-ray uses a different type of laser to read the discs, allowing more data to be stored on a single disc. As Blu-ray can store more data, it can provide a much better picture (Hi-def) than the DVD format as well as better audio. Thus, converting PPT to Blu ray can help us to better store the PPT files as well as get HD enjoyment with the PPT files.

To convert PPT to Blu ray, we need a professional PPT to Blu ray converter. Leawo PPT to DVD Pro, which could effectively convert PPT to Blu ray, PPT to DVD and even PPT to video with all of the source animations, effects, picture and even video clips, is definitely our first choice. Meanwhile, it can allow us to customize the DVD menu as well as add some additional effects such as background music, voice narration and even logo.

Now, let’s download the Leawo PPT to DVD Pro and start the conversion from PPT to Blu ray.

Guide: how to convert PPT to Blu ray with Leawo PPT to DVD Pro?

1. Import PPT files

Run the Leawo PPT to DVD Pro and click “Import” to import PowerPoint files. You can add up to 12 files and burn them all to Blu-ray Disc at one time.

2. Set output

Click the “Options” and choose “Create Blu-ray Disc” so that you can burn the PPT presentations to Blu-ray Disc.

3. Customize DVD menu

If you like, you can choose a menu style from the predefined templates or create your own to make your Blu-ray output even better by clicking “Menu Creator”.

4. Add voice narration

Click “Music”, where you can record voice narration or instruction for each slide or simply add background music for it.

5. Add logo or watermark

Click “Logo” so that you can add watermark/logo to credit your work.

6. Convert PPT to Blu ray disc

Click “Burn” to PPT files to Blu-ray Disc with Leawo PPT to DVD Pro.

How to convert PPT to Blu ray?

Do you ever try to watch a PPT file on your blu ray player? This paper will share you a simple way to watch PPT on Blu ray player by simply converting PPT to Blu ray.

With a PPT to Blu ray converter, converting PPT to Blu ray can be simple process even if you have no computer or software technical skills because this PPT to Blu ray converter can enable you to convert PPT to Blu ay as well as maintain all the animations, pictures and video clips of the source PPT file. Furthermore, it can allow you to customize the DVD menu with your own pictures and music, add voice narration or instructions and logo or watermark for the PPT file and even faster and better convert PPT to Blu ray, DVD and even video formats.

Now, download a PPT to Blu ray converter and install it on your computer.

Step-by-step guide: how to convert PPT to Blu ray?
Step 1: load the PPT files

Launch the PPT to Blu ray converter and click “import” or “add” to import the PPT files. Batch conversion is available here.
You are allowed to preview the PPT files in view screen. In addition, you can set the playback options here.

Step 2: choose output

Simply click “options” to choose output. Here you can choose “create blu ray disc”. And then set the blu ray options such as norm, mode and aspect ratio and even working and output folder.

Step 3: decide DVD menu

Next click “Menu” to choose the DVD menu. This PPT to Blu ray converter provides you multiple DVD menu templates such as standard, natural, business, etc. Just choose one you like. Or you can click “menu creator” to make your own DVD menu, where you are allowed to use your own background music and picture, choose button styles and options.

Step 4: add more effects

If you want to add more effects for the PPT file, you can click “Music” and “Logo” to add music and logo for the PPT file.
In “Music”, you are able to choose your own music as background music or record voice narration or instruction for each slide.

In “logo”, you are permitted to add watermark or logo for the PPT and even personalize the video layout.

Step 5: convert PPT to Blu ray

Finally, click “burn” in the home interface to enter the conversion settings panel, where you can set “image file” and “volume label”.
Next click “start” to officially convert PPT to Blu ray with this PPT to Blu ray converter.

How to convert PowerPoint to DVD with Leawo PowerPoint to DVD Pro?

This is a guide about how to convert PowerPoint to DVD with Leawo PowerPoint to DVD Pro.

Why to convert PowerPoint to DVD?
– Converting PowerPoint to DVD can make the PowerPoint presentations be played on computers which haven’t installed PowerPoint tool.
– Converting PowerPoint to DVD can make the PowerPoint files be enjoyed on DVD players and even televisions.
– Converting PowerPoint to DVD is a great way to backup the PowerPoint presentations.
– Converting powerPoint to DVD is a excellent way to share the PowerPoint presentations with others for further study with the voice narration and instructions.

How to convert PowerPoint to DVD?
To convert PowerPoint to DVD, you just need a PowerPoint to DVD converter which quickly and easily finish the conversion as well as provide some addition functions to better the output such as add voice narration and instructions, background music, logo or watermark or even customize the DVD menu.
Next, lets’ look into how to convert PowerPoint to DVD with Leawo PowerPoint to DVD Pro.

Download a trail version of Leawo PowerPoint to DVD Pro here and install it.

Step 1: add the PowerPoint files

Simply click “import” or “add” to import the PowerPoint files. You are allowed to click the buttons under the view screen for previewing. And then, you are also able to choose “playback options”.

Step 2: choose output

And then, please click “options” to set output. Here you should click “create standard DVD”. In “Blu ray/DVD options”, choose the output DVD disc norm. If you don’t which norm you need to choose, you can click “help” to choose the area you are in.

And next choose Disc mode, aspect ratio, the working folder and output folder here.

Step 3: choose DVD menu

Simply press “menu” to enter the DVD menu, where Background, Button Styles, Captions and Advanced are provided. Many DVD menu templates are offered for you such as standard, holiday, and nature and so on, just choose one you like.

Surely, you are also permitted to make your own DVD menu with your own pictures and music by clicking “Menu Creator”.

Step 4: add some additional effects

This PowerPoint to DVD Pro allows you to add background music and personal logo or watermark.
In “Music”, you can add background music or record narration and instruction for the PowerPoint files.

In “Logo”, you are allowed to add personal logo or watermark and even adjust the output video layout.

Step 5: convert PowerPoint to DVD

Finally, press “burn” to the last step. Set the conversion settings and click “start” to burn PowerPoint to DVD with Leawo PowerPoint to DVD Pro.